Connect Cloudflare
This guide walks you through creating a Cloudflare API token with the correct permissions and connecting it to Tidy Names.
Prerequisites
- A Cloudflare account with one or more domains (zones)
- A Tidy Names account with an organisation set up
Step 1: Create a Cloudflare API Token
Tidy Names uses a Cloudflare API token - not the Global API Key - to access your domain data. API tokens are more secure because you can limit them to only the permissions needed.
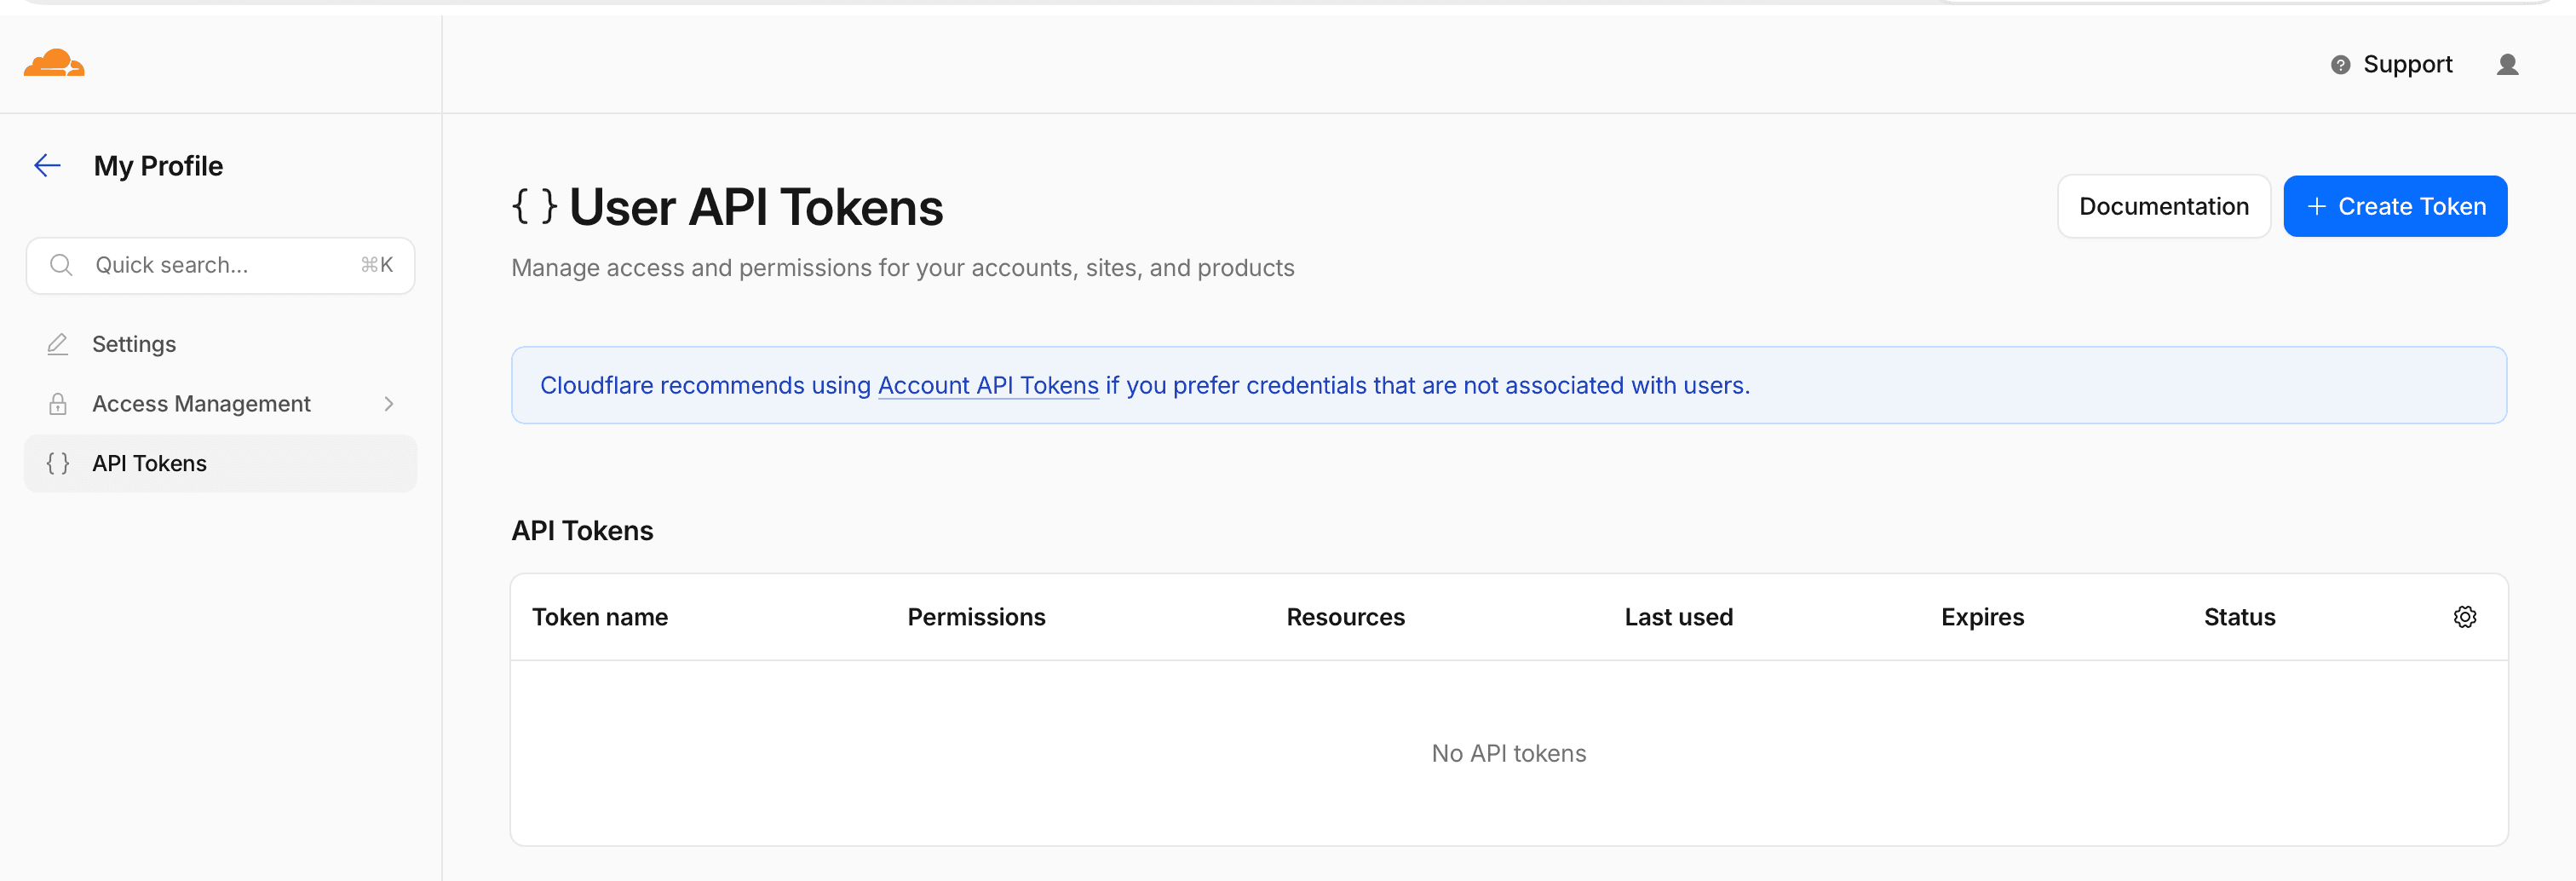
Navigate to API Tokens
- Log in to the Cloudflare dashboard
- Click your profile icon in the top right corner
- Select My Profile
- Click the API Tokens tab in the left sidebar
- Click Create Token
Configure Token Permissions
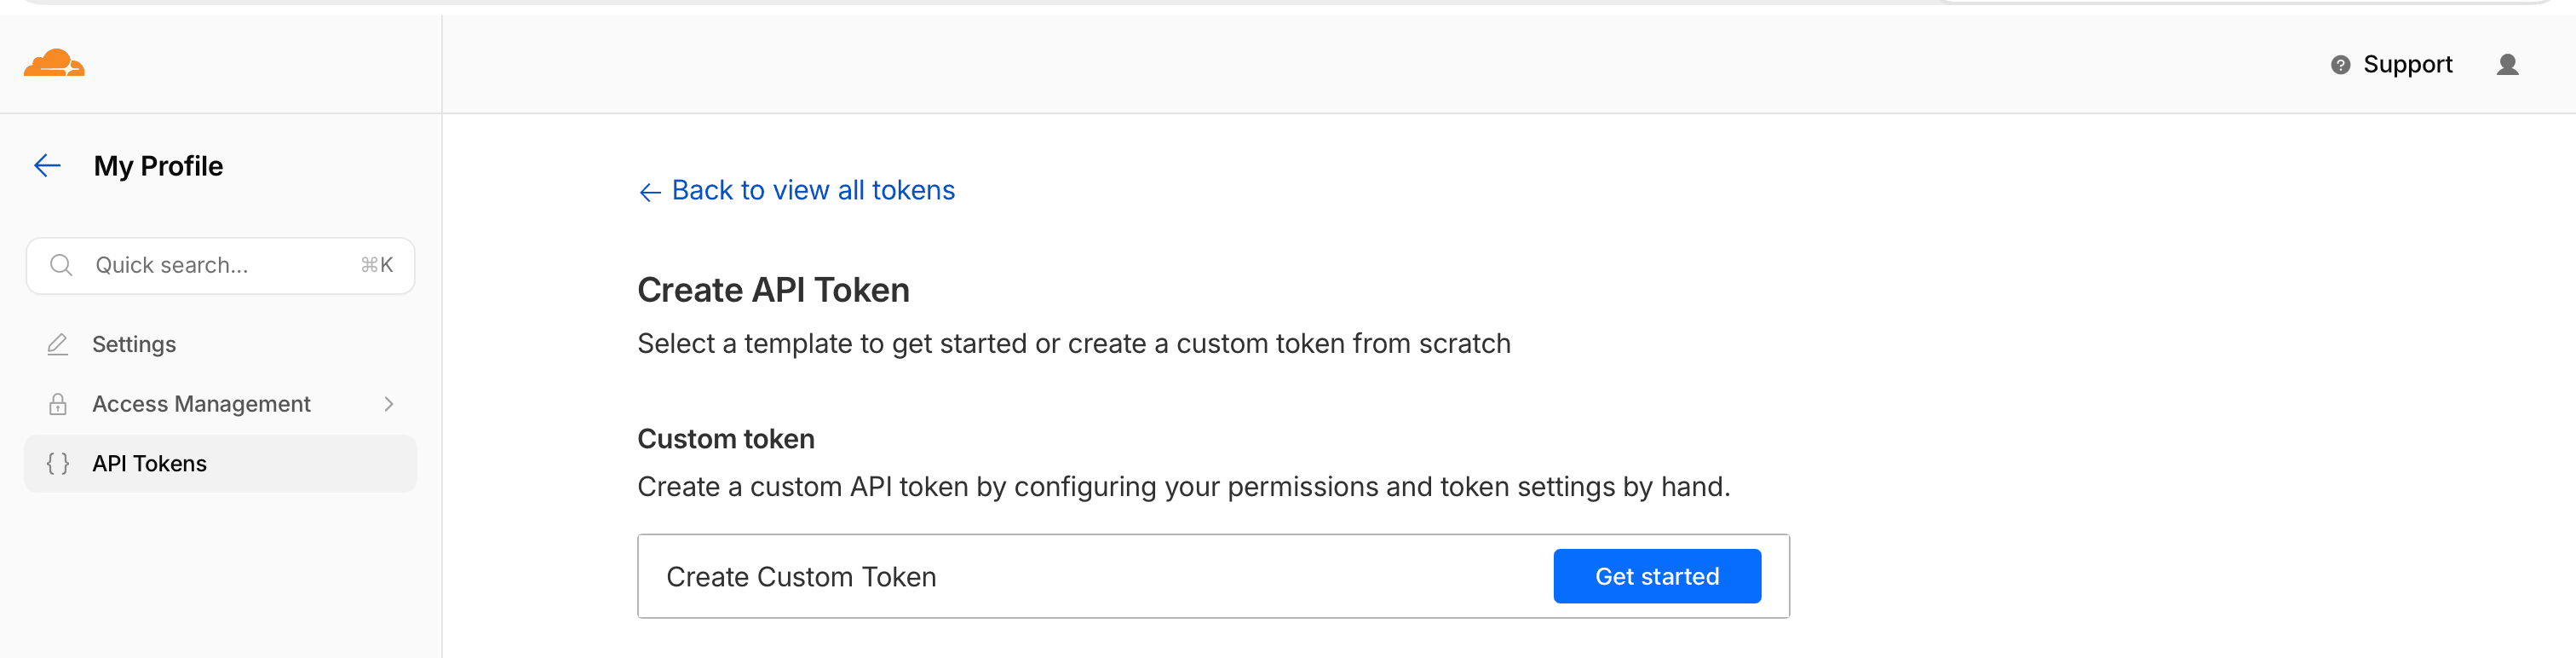
You'll see the Custom token template at the top of the page. Click Get started next to it to create a blank token.
Then add the following permissions:
In the Permissions section, use the three dropdown menus on a single row to select:
- First dropdown: Account
- Second dropdown: Registrar Domains
- Third dropdown: Read
Click + Add more to add a second row and select:
- First dropdown: Zone
- Second dropdown: Zone
- Third dropdown: Read
Click + Add more again to add a third row and select:
- First dropdown: Zone
- Second dropdown: DNS
- Third dropdown: Read
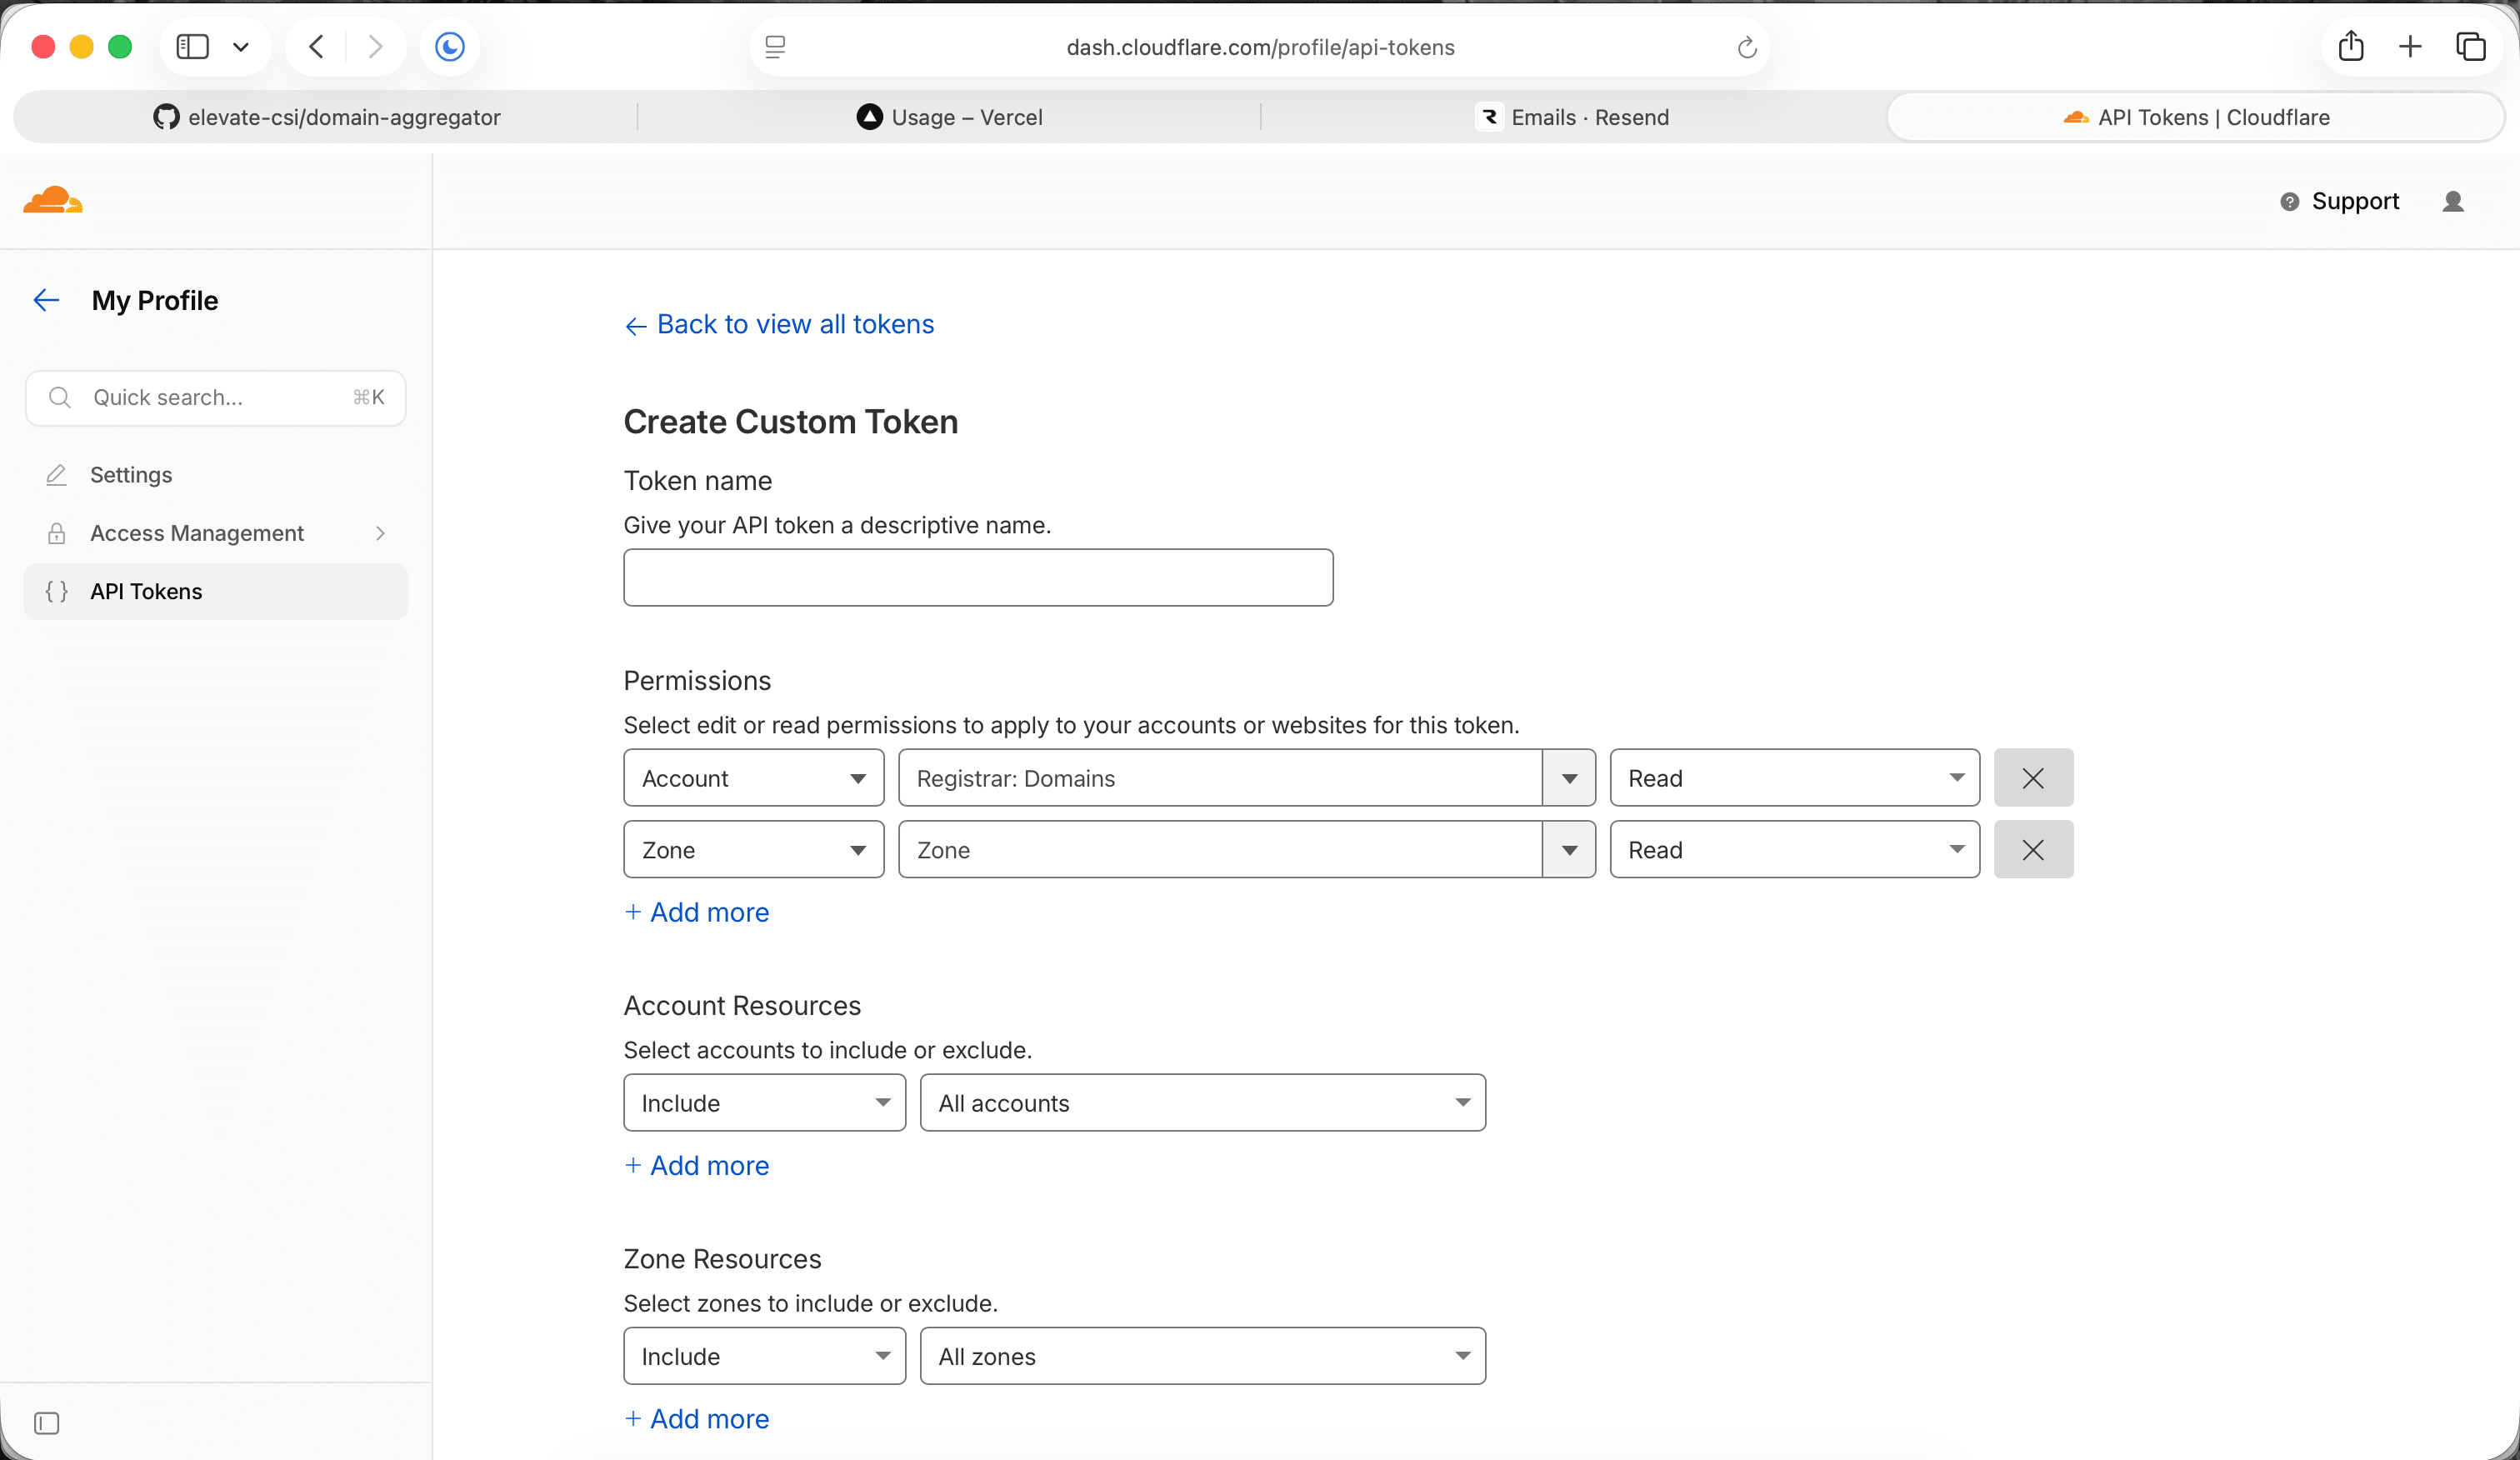
These three permissions allow Tidy Names to:
- Account → Registrar Domains → Read - fetch expiry dates, auto-renew settings, and transfer lock status for domains registered through Cloudflare
- Zone → Zone → Read - list all your domains, their status, and nameservers
- Zone → DNS → Read - fetch DNS records for each domain, used for email security analysis (SPF, DKIM, DMARC) and the DNS records dashboard
Important: Only Read permissions are required. Tidy Names never writes to or modifies your Cloudflare configuration.
Zone Resources
Under Zone Resources, you can choose:
- All zones - gives access to every domain in your account (recommended for importing your full portfolio)
- Specific zone - limits the token to selected domains only
For full details on token permissions, see Cloudflare's API token documentation and the Cloudflare API reference.
Create and Copy the Token
- Click Continue to summary
- Review the permissions, then click Create Token
- Copy the token immediately - Cloudflare will only show it once. If you lose it, you'll need to create a new one.
Step 2: Add the Connection in Tidy Names
- In Tidy Names, go to Connections in the sidebar
- Click Add Connection
- Select Cloudflare from the registrar list
- Paste your API token into the API Token field
- Optionally set a Display Name (e.g. "My Cloudflare Account" or "Production Domains")
- Click Test Connection - you should see a success message confirming the token is valid
- Click Save Connection
Tidy Names will immediately start importing your domains. This usually takes just a few seconds, depending on how many domains you have.
Step 3: Verify Your Domains
After saving the connection, go to the Domains page. You should see all your Cloudflare domains listed with:
- Domain name and status
- Expiry date
- Auto-renew setting
- Nameservers
Click on any domain to see its full detail page, including DNS records, email security analysis, and domain protection checks.
Troubleshooting
Test Connection fails
- Double-check that you copied the full token without any extra spaces
- Verify the token hasn't expired - you can check this in Cloudflare under My Profile > API Tokens
- Ensure the token has all three permissions: Registrar Domains: Read, Zone: Read, and DNS: Read
Missing domains
- If you used Specific zone when creating the token, only those zones will appear. Create a new token with All zones to import everything.
- Only active zones are imported. Domains that are pending or have been deleted in Cloudflare won't appear.
Missing expiry dates
- Expiry dates are fetched via the Cloudflare Registrar API and are only available for domains registered through Cloudflare. Domains using Cloudflare only for DNS will show no expiry date.
- If no expiry dates appear at all, check that your token includes the Account → Registrar Domains → Read permission.
Revoking the token
If you need to revoke access, you can do either of the following:
- In Tidy Names: Go to Connections and remove the Cloudflare connection. This deletes the stored encrypted credentials.
- In Cloudflare: Go to My Profile > API Tokens, find the token, and click Revoke. The connection in Tidy Names will show an error on the next sync.
Next Steps
- Check Email Security - audit SPF, DMARC, and DKIM for your imported domains
- Review Domain Protection - check transfer locks and WHOIS privacy
- Organise with Tags - categorise your domains for easy filtering